- FAQ
- +62 21 28565201 09:00 - 17:00 WIB
- +62811-841-5201
- ENG
By Lukman 20 December, 2022
RDP is a protocol that can help you connect with other computers. To do so, you need to use an RDP port. In the following article, discover how to change the RDP port on your Windows operating system.
Remote Desktop Protocol (RDP) is a type of protocol that allows users to connect to another computer through a network connection. RDP allows users to access the desktop of a remote computer and make changes as if they were sitting directly in front of it.
Before you change the Port on your Remote Desktop, ensure you have access to the Remote Desktop as an administrator. Here are the steps to change the Port on the Remote Desktop:
1. Log into your Remote Desktop using your Administrator account.
2. After logging in, please click Start on the bottom left.
3. In the Search Box column, please type regedit
4. Then the Windows default application will appear, namely regedit.exe (Registry Editor)
5. Click regedit, or you can press Enter on your keyboard

6. The Registry Editor will appear, and please double-click on the following sections:
> HKEY_LOCAL_MACHINE
> SYSTEM
> CurrentControlSet
> Control
> Terminal Server
> WinStations
> RDP-Tcp
7. Look at the right column, then scroll down and look for PortNumber. Then it will look like this:

8. Double Click PortNumber
9. Edit DWORD value will appear. Select Decimal in the Base menu
10. Change the Value Data to the desired new Port (for example, I changed Port 3389 to 4088), as shown below:

11. Click OK, then close the Registry Editor
12. Then, proceed to open the Port from the firewall so that it can be accessed
13. Click Start > Control Panel
14. After entering the Control Panel, go to System and Security > Windows Firewall
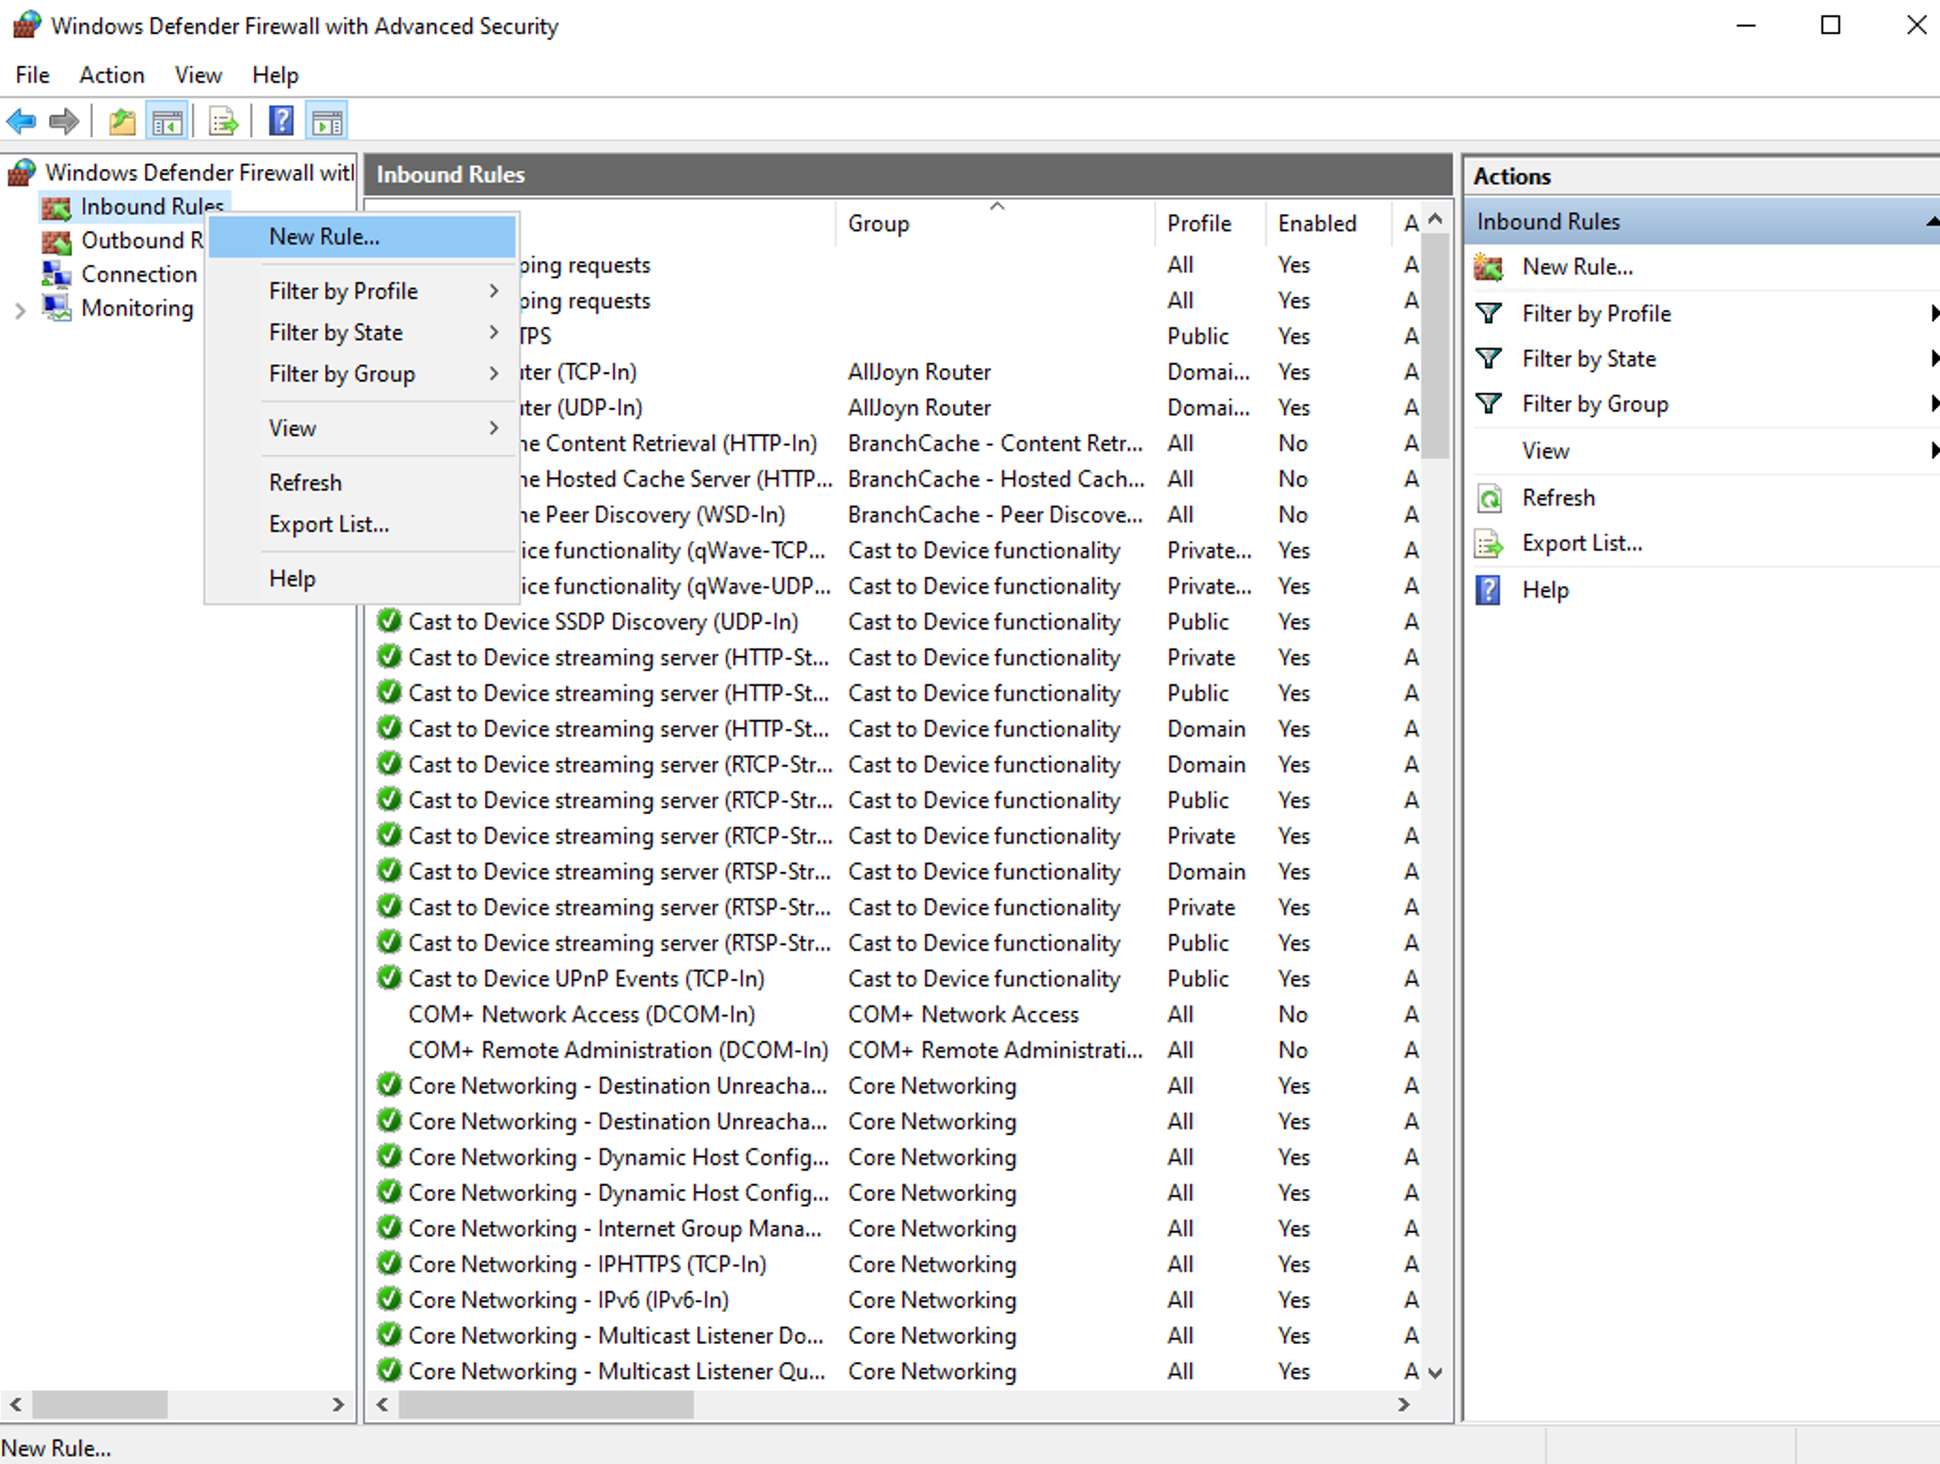
15. Then click Advanced Settings in the left column

16. Then, the Windows Firewall with Advanced Security view will open
17. Right-click Inbound Rules > New Rule..., as shown below:


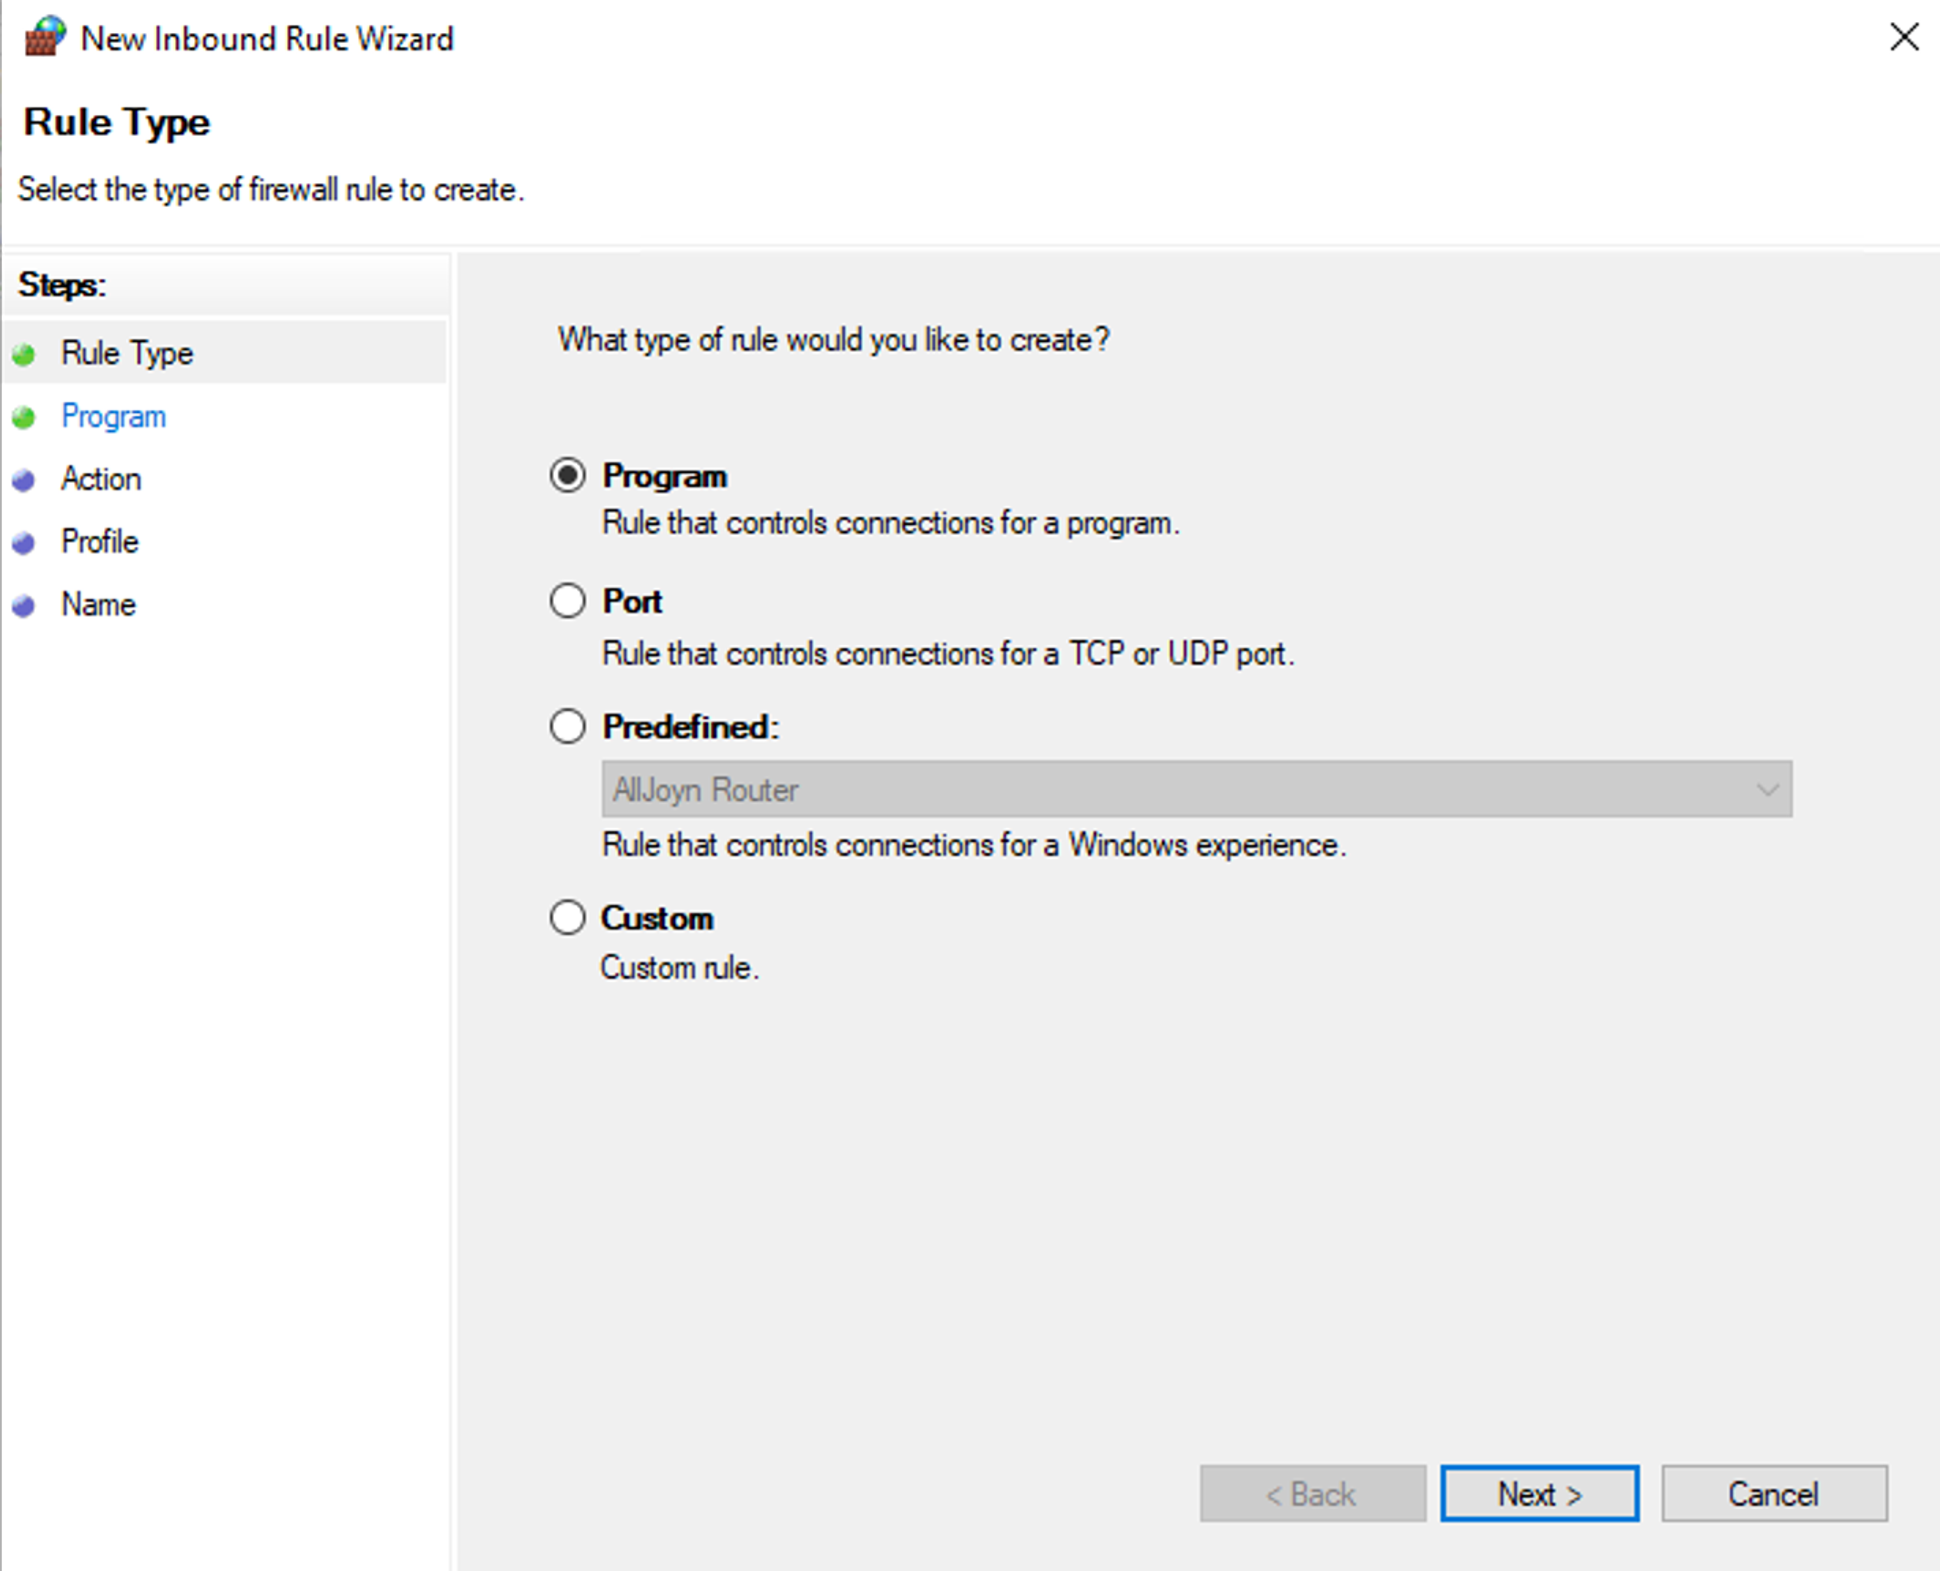
18. In Rule Type, select Port > Next
19. Fill in Specific local ports by entering the Port you just created in the Registry Editor, as shown below:

20. Click Next until you reach the Name tab. Fill in the Name field as desired
21. Then click Finish
22. After all is done, restart your Windows Remote Desktop
23. Please log in using your new Port (IpRemoteDesktop: Newport), example: 127.0.0.1:4088
That's the explanation of RDP and how to change the RDP port number that you can do on the Windows operating system. This explanation can help you.
Consult with our Cloud experts to learn more about Cloudmatika's services here.